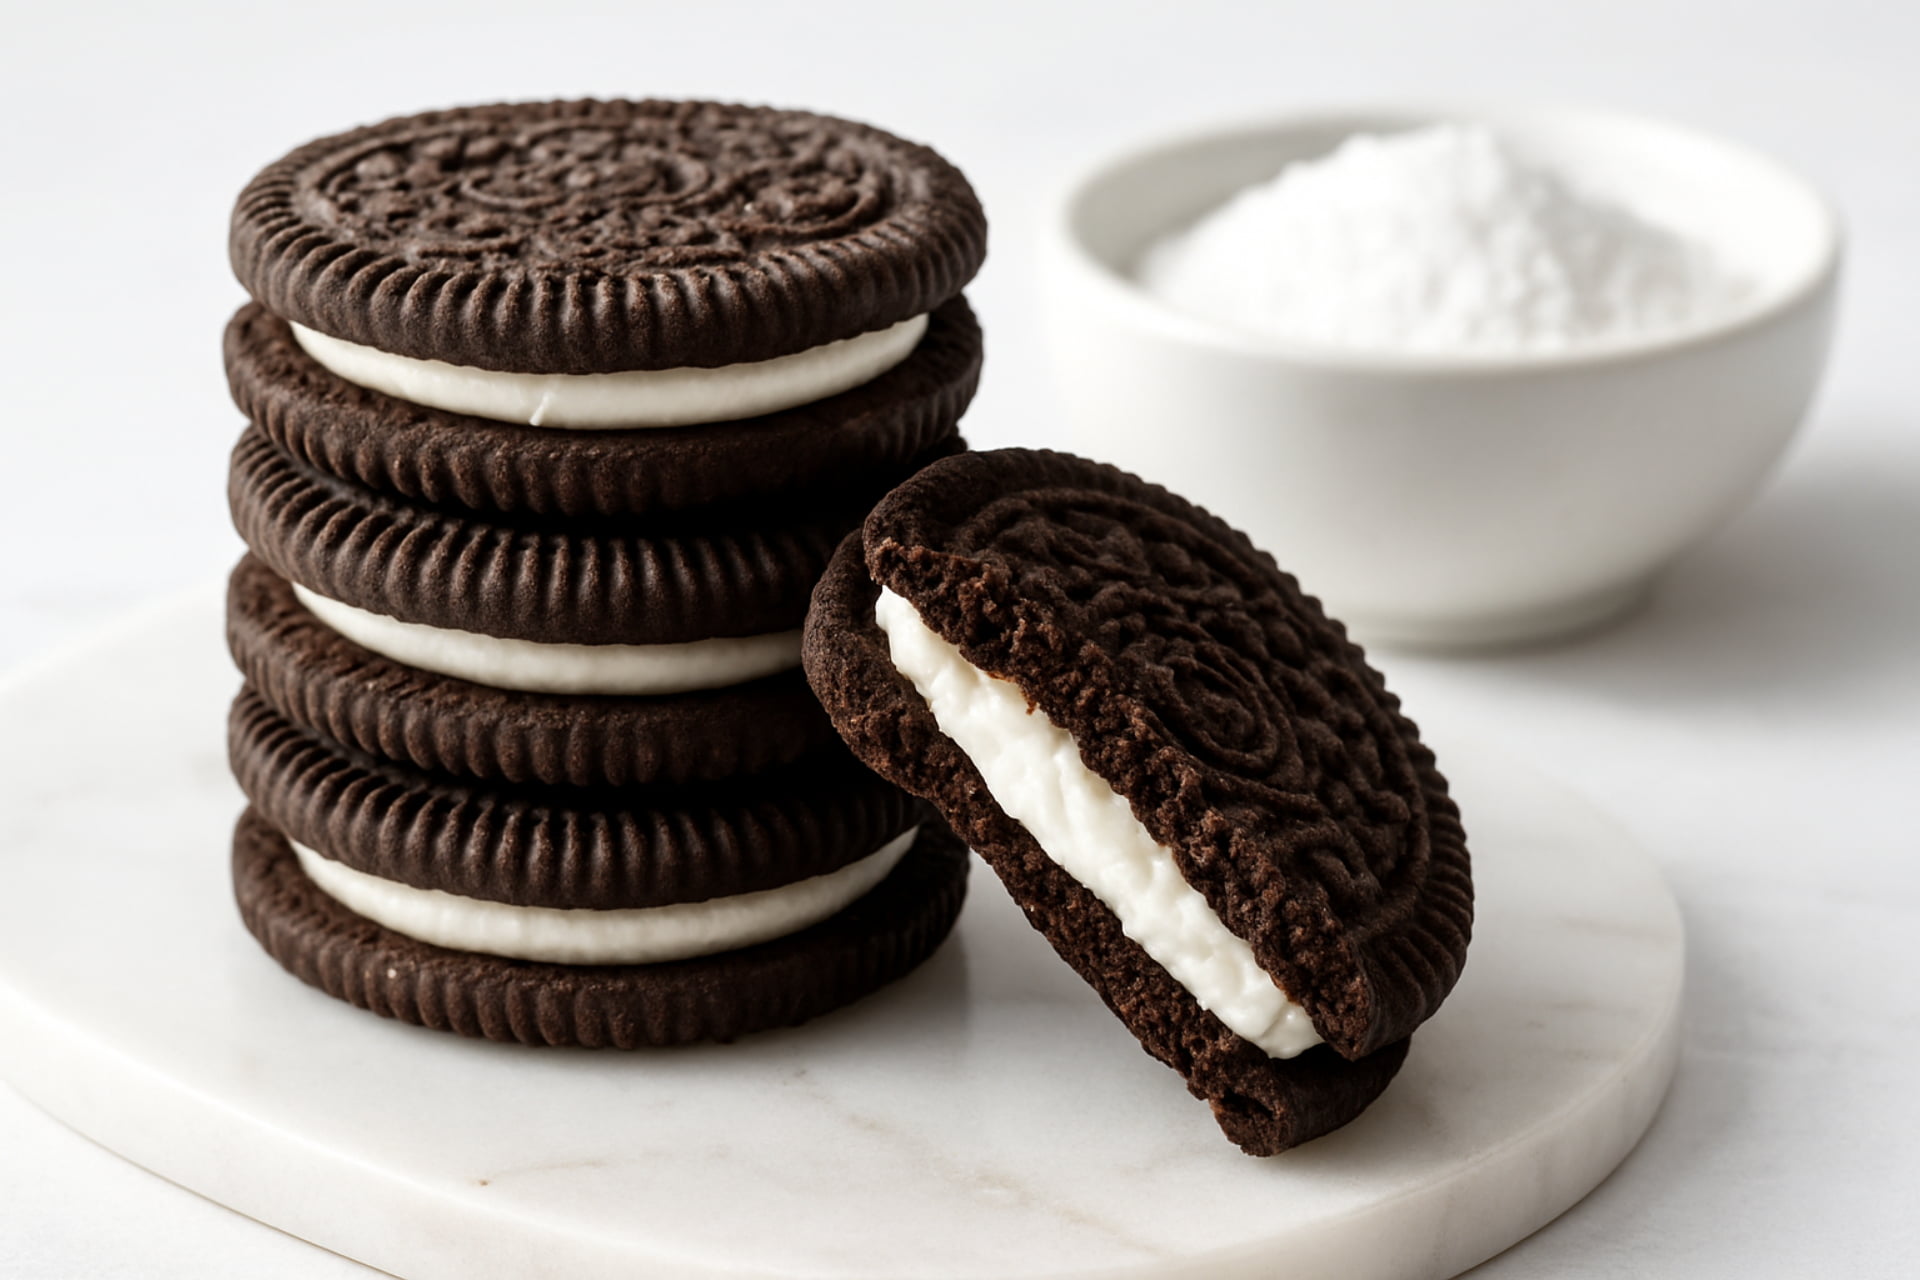
Hello, fellow bakers! As a professional chef, I know that sometimes you just need that iconic chocolate-and-cream combination—the king of cookies, the Sugar-Free Oreo. The problem? That classic cookie is packed with sugar. But what if I told you that you can replicate the deep, rich flavor and that satisfying crunch, all while keeping it completely sugar-free, low-carb, or even gluten-free?
Today, we are diving into the science and joy of creating the ultimate sugar-free copycat Oreo cookies. This recipe is a game-changer, delivering all the nostalgia without the guilt. Get the aprons ready, because it’s time to bake!
The Challenge of the Copycat Cookie
Recreating an iconic cookie like the Oreo is not just about combining ingredients; it is about mimicking texture and flavor depth. The challenge with a sugar-free version is achieving that rich, dark color and crisp bite without using regular sugar, which is vital for structure. Through careful substitution, we conquer this challenge!
Transitioning to a Healthier Classic
This recipe is incredibly flexible, a point that is critical for modern baking. Why is flexibility important? It allows us to cater to various dietary needs without sacrificing the final result.
- You can easily make this gluten-free.
- You can also ensure this cookie is low in carbs.
We will walk through the specific substitutions required for each dietary goal.
2: The Essential Ingredients (Cookie & Filling)
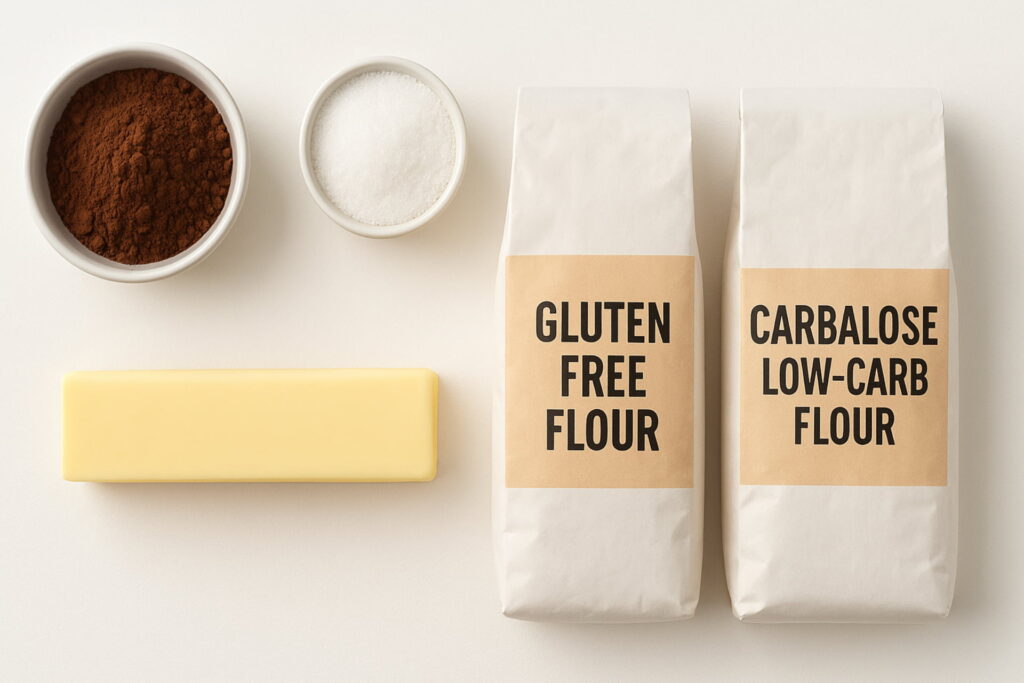
Before we start, let’s gather our components. The quality of your ingredients directly affects the final flavor. It is imperative that you select high-quality unsweetened cocoa powder for that deep, dark “Oreo” hue.
2.1. Dry Ingredients: The Base of the Cookie
For the perfect cookie shell, we need precision in our dry components.
| Ingredient | Quantity | Chef Notes & Substitutions |
| Unsweetened Cocoa Powder | 1⅓ cups | Use a high-quality, dark cocoa powder for authentic flavor and color. |
| All-Purpose Flour | 1 ½ cups | Substitution Tip: To make this gluten-free, use a gluten-free all-purpose flour blend. To make it low-carb (keto-friendly), use a specialized low-carb all-purpose flour (avoid baking mixes). I personally recommend Carbalose low-carb flour. |
| Salt | ¼ teaspoon (a pinch) | This small amount is crucial. It balances the bitterness of the cocoa and enhances the overall chocolate flavor. |
2.2. Wet Ingredients: Flavor and Structure
These ingredients bind the dough and provide richness.
| Ingredient | Quantity | Chef Notes & Details |
| Butter | 1 cup (2 sticks) | Must be softened to room temperature. This is essential for proper creaming with the sugar alternative. |
| Granular Sugar Alternative | 2 cups equivalent to sugar | Use your preferred stevia, erythritol, or monk fruit blend. Ensure the quantity is equivalent to 2 cups of regular sugar for sweetness balance. |
| Vanilla Extract | 2 cups is equivalent to sugar | Use pure vanilla extract for the best flavor depth. |
| Eggs | 2 large | The eggs act as the primary binder in our dough. |
2.3. The Creamy Center: The Iconic Filling
The filling must be ultra-smooth and sweet.
| Ingredient | Quantity | Chef Notes & Alternatives |
| Sugar-Free Powdered Sugar | 3 cups | This is non-negotiable for a smooth, creamy texture. Granular alternatives will not work here. |
| Butter | 1 cup (2 sticks) softened | Must be softened. Alternatively, a high-quality vegetable shortening can be used for a whiter, more stable filling. |
| Optional Extract | 1 teaspoon | Vanilla extract is classic. You can also experiment with peppermint or almond extract for variation. |
3: Step-by-Step Cookie Dough Perfection
The process for these sugar-free cookies mirrors classic baking techniques, ensuring maximum flavor and a tender texture.
3.1. Preparing the Dry Mix
First, a crucial step: aeration and distribution.
- Sift and Whisk: In a medium bowl, whisk or sift together the unsweetened cocoa powder, the flour (or your chosen substitute), and the salt.
- Ensure Uniformity: Sifting is preferable, as it breaks up any clumps in the cocoa powder, which is necessary for a uniform color and texture in the final cookie.
- Set Aside: Once combined, set this bowl aside, awaiting the wet ingredients.
3.2. Mastering the Creaming Process
This is where the magic begins. Proper creaming is key to tender, crisp cookies.
- Cream the Fats and Sweetener: In a separate, larger mixing bowl, begin to cream together the softened butter with your granular sugar alternative.
- Mix Thoroughly: Mix until the ingredients are visually somewhat creamy and significantly lighter in color and fluffier in texture. This process incorporates air, giving our final cookie its necessary lift and crumb structure.
3.3. Incorporating Wet and Dry
We now combine the mixtures, building the final dough.
- Alternating Additions: We are going to add the contents from the first bowl (the flour, cocoa, and salt) to the mixing bowl. Do this by adding half of the ingredients at a time, stirring gently between additions. This prevents the dry ingredients from flying everywhere and ensures even mixing.
- Flavor and Binding: Then add the vanilla extract and eggs to a mixing bowl. Mix until just combined. Chef’s Note: Do not overmix the dough once the flour is added, as this can develop excess gluten, resulting in tough cookies.
3.4. Rolling and Chilling the Dough (The Non-Negotiable Step)
Chilling is the secret to perfect sandwich cookies.
- Prep the Pan: Line a short-rimmed baking pan with parchment paper. This will be used to hold your rolled-out dough.
- Rolling Out: Tip: Divide the dough into halves or thirds and sprinkle the surface with a bit of flour or cocoa powder as needed while rolling it out.
- Even better: Roll the dough out between two pieces of parchment paper; this technique makes the task much easier and reduces sticking.
- Achieving Thickness: Roll the dough to a thickness between ½ inch and ¼ inch. This range yields the desired crispness of a sandwich cookie.
- Crucial Chill Time: Place the pans with the rolled-out dough into the refrigerator for at least one and a half hours (1 ½ hours). Chilling is necessary to solidify the fats, which prevents the cookies from spreading excessively in the oven.
4: Baking and Finishing Touches
With the dough perfectly chilled, it is time to bake and assemble our sugar-free masterpieces.
4.1. The Baking Process
Timing and temperature are important for that signature crunch.
- Prepping the Oven: When you are ready to make your cookies, prep a separate cookie/baking sheet for non-stick use (either lining it or using a silicone mat) and preheat your oven to 350°F (175°C).
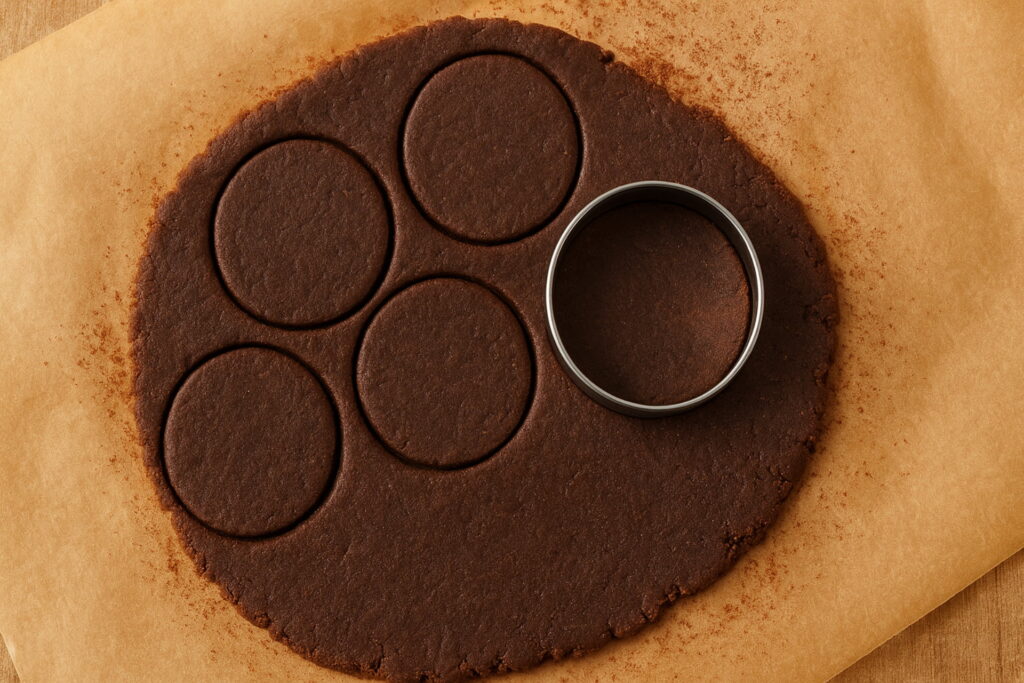
- Cutting the Shapes: Remove the rolled-out, chilled cookie dough from the refrigerator and proceed to cut out the cookies. Use a round cookie cutter or a similarly sized product.
- Placement: Place the cut-out cookie circles onto the prepared cookie/baking sheet, taking care that the edges do not touch (leave at least ½ inch apart).
- Bake Time: Bake for 18–20 minutes or until the edges of the cookies begin to feel hard when lightly touched. This indicates they are properly set and crisp.
- Cooling: Remove the cookies from the oven and allow them to cool completely on a rack. The cookies must be entirely cool before adding the filling.
4.2. Making the Iconic Center Icing
The filling must be smooth and easily spreadable for the perfect sandwich.
- Cream the Filling Base: In a clean mixing bowl, cream together your remaining ingredients: the softened butter (or shortening) and the sugar-free powdered sugar.
- Achieve Fluffiness: Mix on medium speed until the mixture is light, fluffy, and completely smooth. Scrape down the sides of the bowl often.
- Add Flavor: If desired, mix in the optional extract, such as 1 teaspoon of vanilla extract, for center flavoring.
4.3. The Final Assembly: Making the Sandwich
It’s time to bring the two halves together!
- Spread the Cream: Once the chocolate cookies are entirely cooled, simply spread the creamed icing generously onto one side of a cookie.
- Close the Sandwich: Gently place a second cookie on top of the filling, pressing down lightly until the filling is evenly distributed to the edges.
- Serve and Store: Your Sugar-Free Copycat Oreo Cookies are now ready! Store them in an airtight container at room temperature.
5: Chef’s Notes and Troubleshooting
Even the best recipes can benefit from expert advice. Here are tips for ensuring your sugar-free cookies turn out perfectly every time.
Why Did My Cookies Spread Too Much?
If your cookies lost their shape or became too thin, the likely culprit is the fat temperature.
- Problem: The butter was too warm when baking, or the dough was not chilled long enough.
- Solution: Ensure the butter used in the dough is at the correct room temperature before creaming, and never skip the 90-minute chilling step. Chilled dough resists spreading.
My Dough Was Too Crumbly!
Working with specialty flours (like low-carb or gluten-free blends) can sometimes result in a drier, more difficult dough.
- Tip: If the dough is too crumbly to roll out, add a teaspoon of milk (dairy or almond) at a time until the dough holds together. Alternatively, a little extra egg white can provide the necessary moisture and bind.
Low-Carb Flour Advice
When using low-carb flours, it is imperative to avoid baking mixes. Why should you avoid baking mixes? Baking mixes already contain leavening agents (like baking soda or powder), which are not accounted for in this recipe, potentially leading to an unpredictable texture and rise. Stick to pure low-carb all-purpose flour substitutes.
The Takeaway
There you have it—a professional-grade recipe for Sugar-Free Copycat Oreo Cookies that respects your dietary goals without sacrificing the joy of a classic treat. These cookies are perfect for guilt-free snacking, holiday baking, or simply enjoying with a glass of almond milk. Happy baking!
Stay updated with the latest blogs by visiting our website.